Reporting
Various reports are available within the Victor UI based on the particular products being utilized. Information may be viewed within the Victor UI, as well as downloaded via .csv.
Access
In order to gain access to Reporting within the Victor UI, first navigate to app.stage.victorfi.com for the Staging environment or app.victorfi.com for the Production environment. Here you may login to your Victor account.
InfoNote: If you are attempting to log in for the first time and do not know your password, you may follow the password reset steps on the login page.
If you are having difficulty gaining access to Victor’s Staging or Production Environment please contact [email protected] or your Victor representative.\
Deposit Accounts
Navigate to Deposit Accounts on the left-hand ribbon and select the appropriate deposit account (this is your MVB bank account). Here you may view all transaction in and out of your MVB account. You can select date range and also filter by amount to easily locate specific transactions.\

Figure 1. Deposit Account Overview
You may also download the Transaction History in .csv file format via the download button on the right hand side of the Transaction History page. The download will be produced using the date range and filters you have selected.\
Reconciliation Report
The Reconciliation Report provides a comprehensive transaction view of all money movement into, and out of your Deposit Account(s) for a single day. This includes activity that originates outside of Victor (i.e., inbound transactions, or transactions you initiate via your Online Banking Portal).
InfoNote: The Reconciliation Report is available in the Production environment only.
To access this report, navigate to Deposit Accounts on the left-hand ribbon. Then select the Reconciliation Report icon in the upper right-hand corner as shown below.
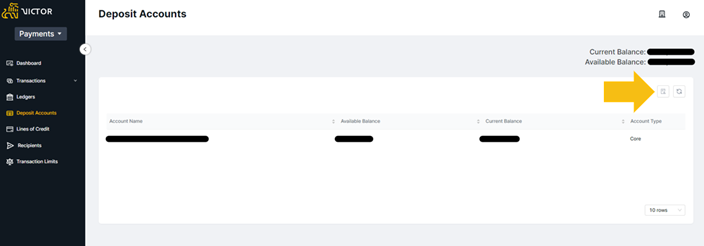
Figure 2. Deposit Account Summary
A date selection modal will appear. You may select any single business day.
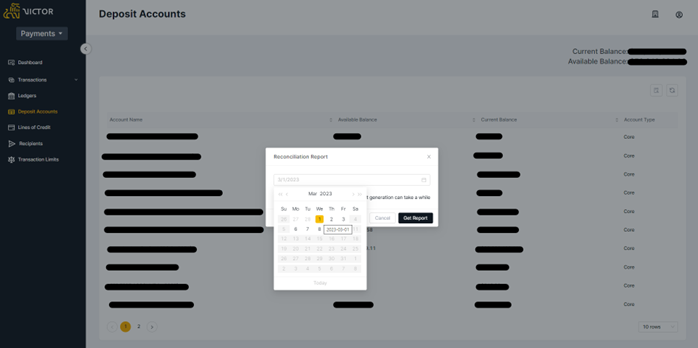
Figure 3. Deposit Account Reconciliation Report Date Selection
After selecting “Get Report”, a .csv file will begin downloading. See below report example:

Figure 4. Reconciliation Report Export
A list of all Deposit Accounts, including their opening and closing balance for the selected day will be presented at the top of the report. Below is a description of each field contained in the Reconciliation Report:
| Field Name | Description |
|---|---|
| Account Number | The Victor Account number of the Deposit Account. |
| Date | The Date of the Reconciliation Report. |
| Opening Balance | The balance of the Deposit Account at the beginning of the day. |
| Closing Balance | The balance of the Deposit Account at the end of the day. |
| Account Number | The Victor Account number of the Deposit Account. |
| Account Name | The Name of the Deposit Account. |
| Transaction Date | The Date the transaction was posted to the Deposit Account. |
| Victor ID | The Victor Transaction ID for the Transaction. This will be shown for all transaction types except those originated outside of Victor (i.e., though an Online Bank Portal). |
| Core ID | The Core Banking ID of the transaction. |
| Transaction Type | Transaction Type. |
| Virtual Account Name | If the Transaction originates from, or is sent to a Victor Virtual Account, the account name will be shown here. If this is empty the transaction concerns the Deposit Account only. |
| Virtual Account Number | If the Transaction originates from, or is sent to a Victor Virtual Account, the account number will be shown here. If this is empty the transaction concerns the Deposit Account only. |
| Trace Number | The ACH Trace Number for the transaction. This will only be shown for ACH transactions. |
| IMAD | A unique number assigned to each FedWire payment you have originated. This is the input value of sender. |
| OMAD | A unique number assigned to each FedWire payment you have received. This is the output value of receiver. |
| Amount | The transaction amount. |
| Memo Details | Populated for Outbound Wires when a Description is input via the Createwire endpoint, or Outbound Wires created via the Victor UI with the ‘Memo’ field populated. |
The Reconciliation Report for the previous business day becomes available at approximately 9am Eastern Time each day.
Ledger Program
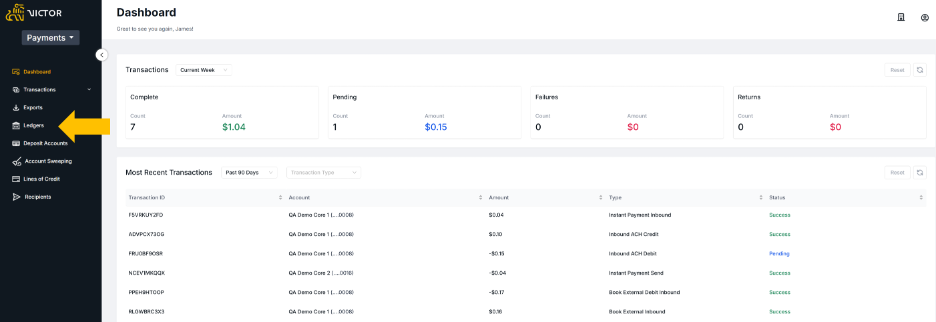
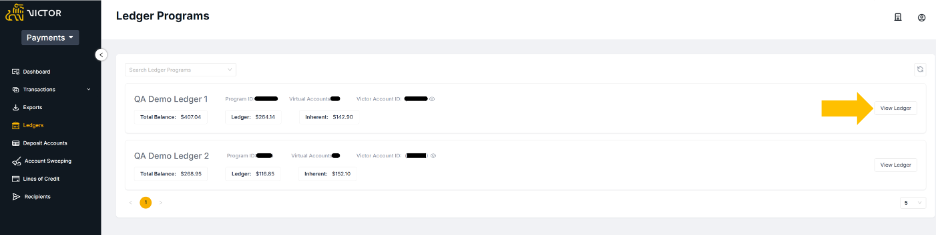
Navigate to Ledgers on the left-hand ribbon. Here is an overview of each Ledger Program configured for your account.

Figure 5. Ledger Program Selection
.png")
• Program ID is the programmatic value for referencing the specific ledger program when making API calls
• Virtual Accounts provides the count of virtual accounts that reside within the specific ledger
• Victor Account ID is the 16-digit Victor account number from which you will originate payments\
InfoNote: The Victor Account ID is only available via the Victor UI. It’s important to note this before commencing your integration efforts.

• Total Balance: the total balance within the primary account of the Ledger Program
• Ledger: the total amount of funds held within virtual accounts within the Ledger Program
• Inherent: the amount of funds within the primary account that have not been allocated to underlying virtual accounts within the ledger
Select the appropriate ledger by clicking ‘View Ledger’.\
View Ledger
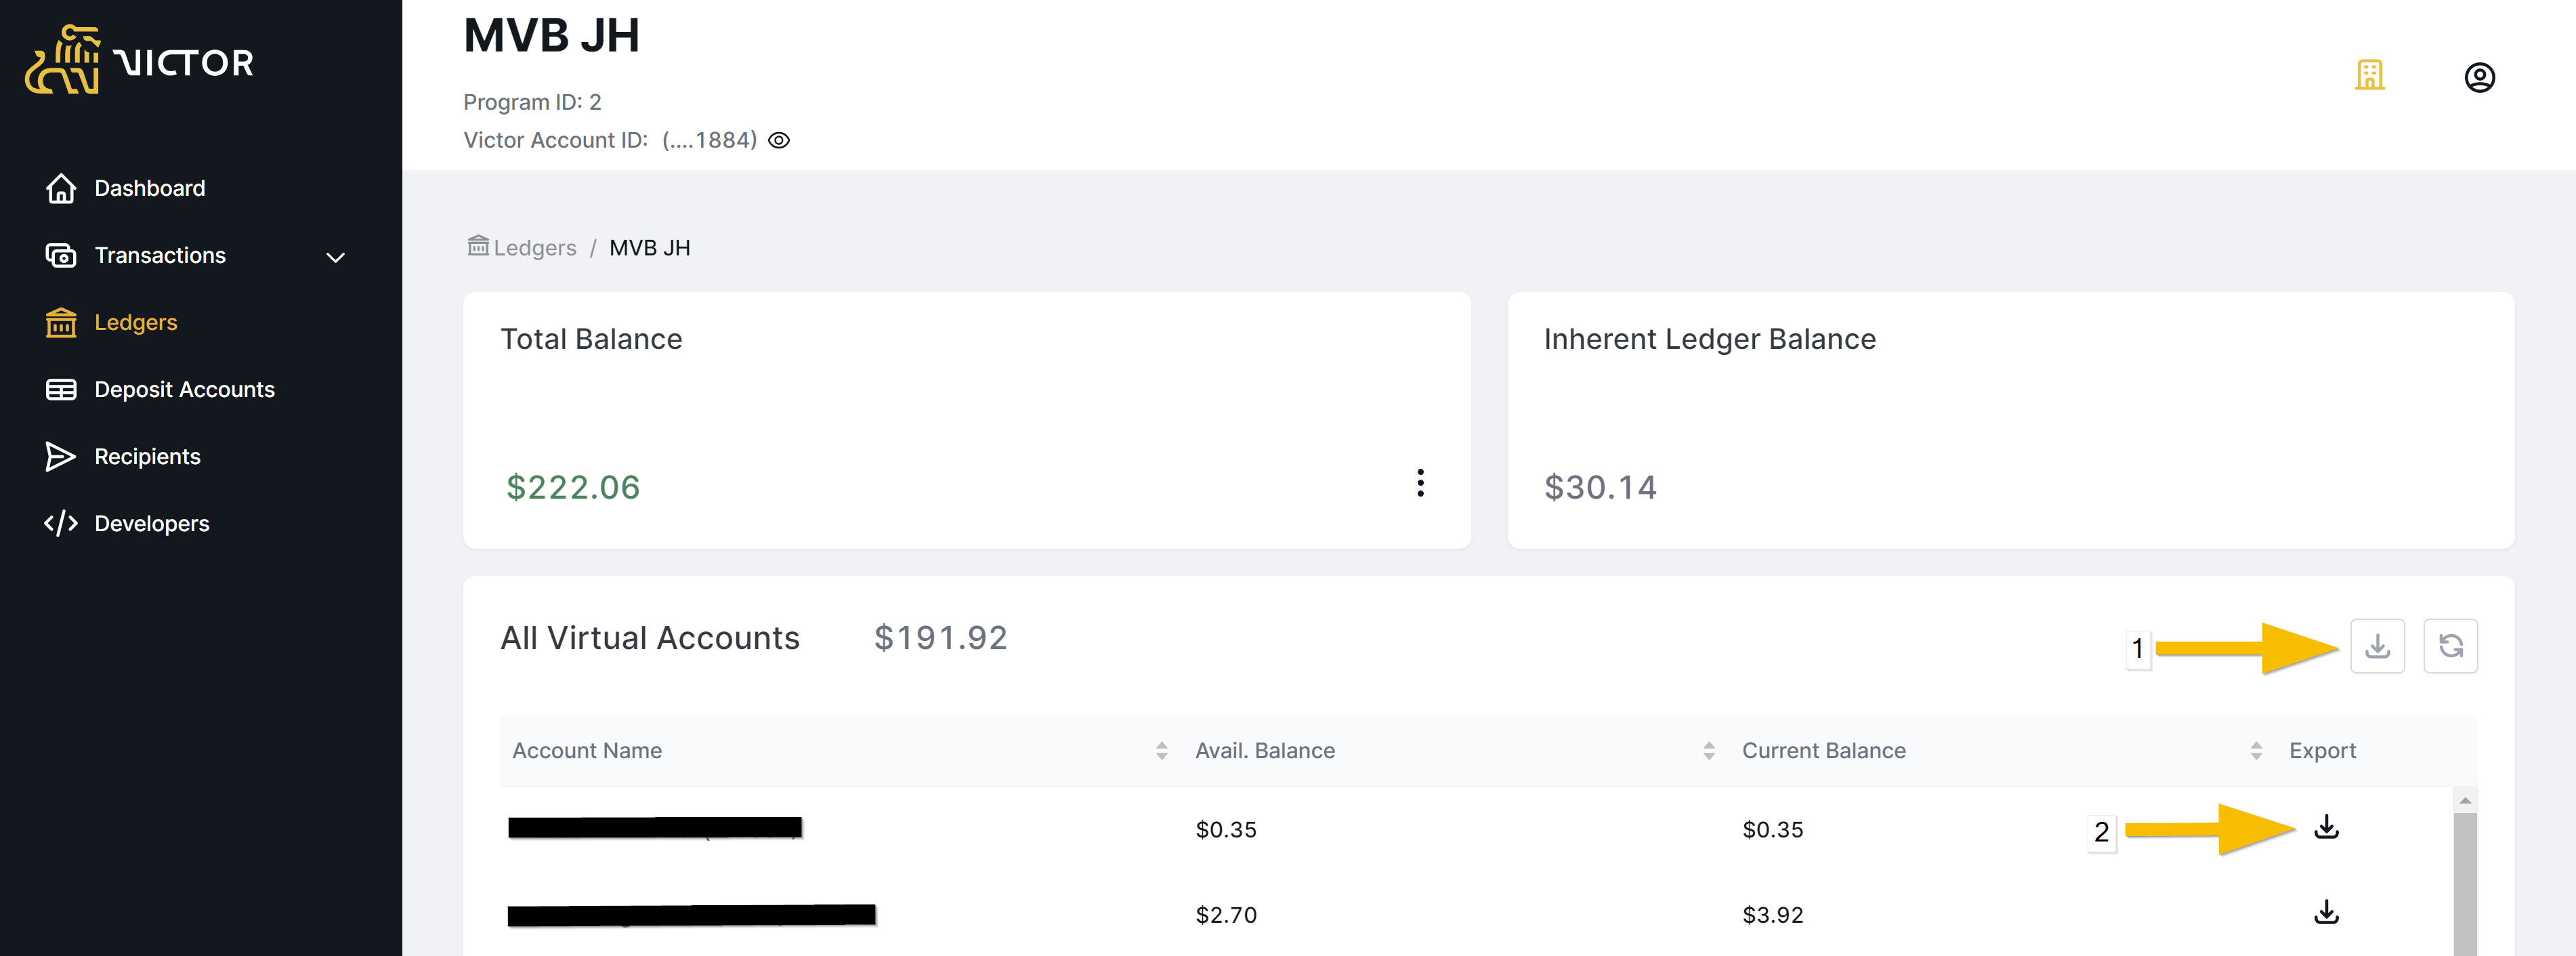
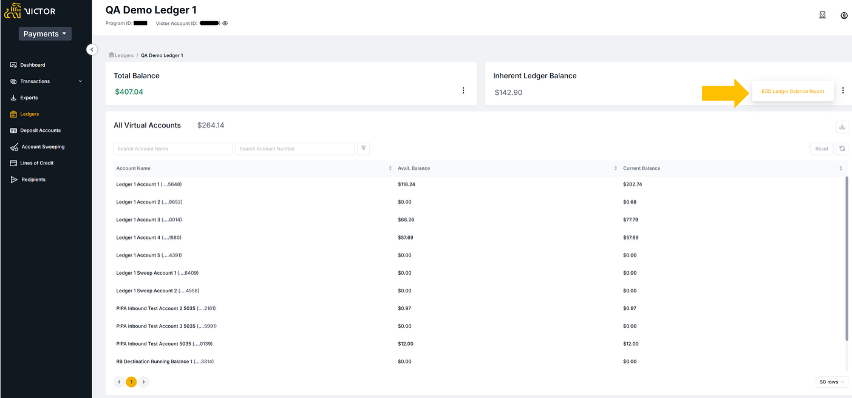
Figure 6. Ledger Program Overview
Within the Ledger Transaction View, you will see the Total Balance and the Inherent Ledger Balance. Beneath this section is the Virtual Ledgers panel.
The Virtual Ledgers panel shows the total value of funds that have been allocated to all virtual accounts.
Here you are able to download
(1) all accounts, providing a consolidated report of all activity in/out of all virtual accounts.
(2) download a transaction history corresponding to a single virtual account.\
EOD Ledger Balance Report
The EOD (End of Day) Ledger Balance Report provides an overview of a single ledger program’s virtual accounts over a user defined date range of up to 90 days.
To access the report navigate to Ledgers from the left-hand ribbon.
Select the relevant ledger program.
Select the expand icon in the Inherent Ledger Balance tile and select EOD Ledger Balance Report.
Select a date range.
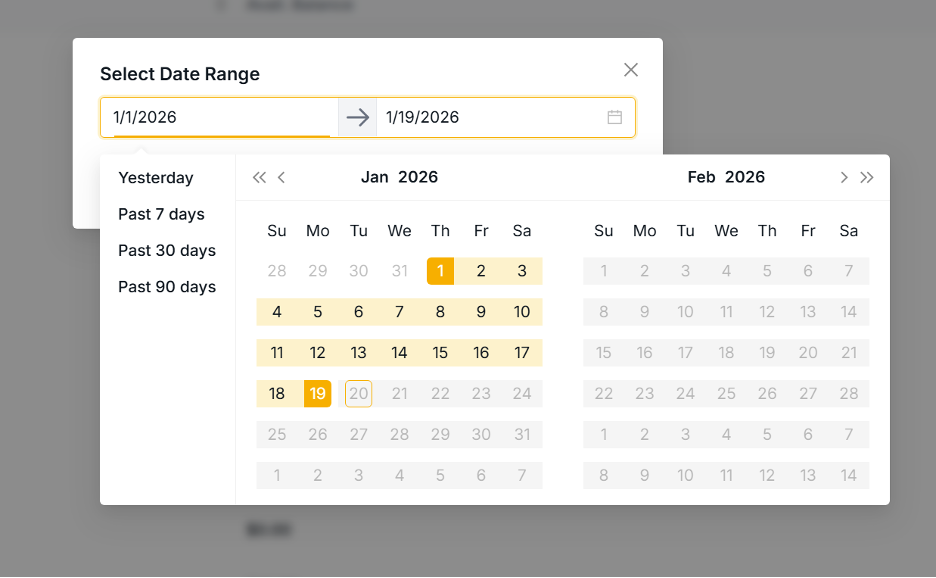
The provided export file will be in the following format: EOD_'program name''ledger name''last three digits of FBO Account Number'Balance_Report'date'_'date'.
InfoNote: For ledger programs with a large number transactions will take additional time to download compared to a program with a low transaction volume. Selecting a single day or a smaller date range will speed up the export.

| Field Name | Description |
|---|---|
| Virtual Account | The client-assigned name of the virtual account.. |
| Virtual Account Number | The 16-digit virtual account number. |
| Date | The date of the record, expressed as M/DD/YYYY. |
| Balances | All balances shown represent the End of Day (EOD) balance for the displayed accounts. |
| Virtual Total | The total EOD balance of all virtual accounts on the displayed date. |
| FBO Core Total | The EOD balance of the FBO (For Benefit Of) Core Account on the displayed date. |
| Inherent Balance | The EOD inherent balance of the ledger program (FBO Core Total minus the Virtual Total). |
InfoNote: Virtual accounts that have never had a transaction will not show in this report.
The EOD Ledger Report is intended to provide an overview of the EOD balance of all virtual accounts and the associated FBO Core account on a given day, or over a date range.